Helical Spring stitch is a fascinating knitting technique that results in a coiled effect that resembles a helical spring. While this stitch may appear complex and time-consuming, the final result is well worth the effort.
I have created step-by-step instructions accompanied by pictures and video tutorials to assist you in learning how to knit the Helical Spring stitch. With practice and patience, you'll be able to create stunning projects that showcase the coiled effect of the Helical Spring stitch.
To make the HELICAL SPRING stitch, follow these steps:
- Bring the yarn to the back of the work.
- Insert the right-hand needle into the next stitch on the left-hand needle.
- Wrap the yarn around both needles for 10 times. Use the tip of your right thumb to grip yarn.
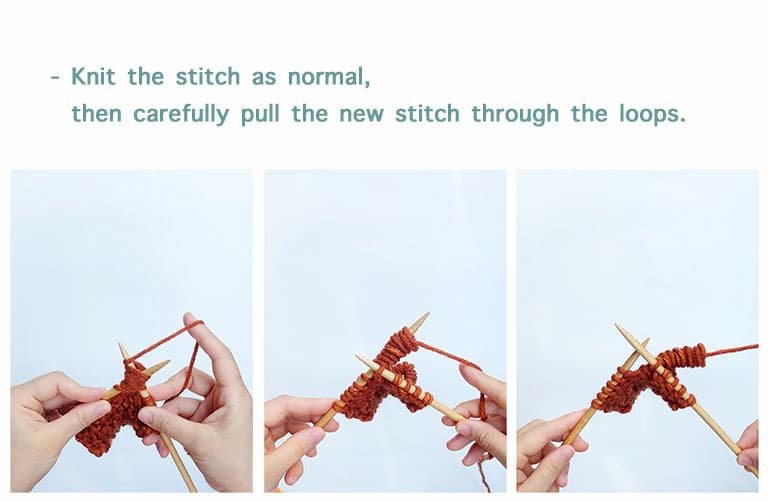
- Knit the stitch as normal, then carefully pull the new stitch through the loops.
- Gently pull on the working yarn to coil the loops up close to the needle.


PATTERN
Cast on a multiple of 4 stitches.
Row 1: Knit.
Row 2: Purl.
Row 3; Knit.
Row 4: Purl 1, * Helical Spring stitch, knit 1, purl 2; repeat from * to last last 3 sts, Helical Spring stitch, knit 1, purl 1.
Row 5: Knit.
Row 6: Purl 3; * Helical Spring stitch, knit 1, purl 2; repeat from * to last last 5 sts, Helical Spring stitch, knit 1, purl 3.
Repeat rows 3-6.


